인텔리제이에서 vscode의 Ctrl + D (같은 단어 선택) 기능 KeyMap에서 찾기
vscode를 이용할 때 같은 단어를 여러개 선택하려면 ctrl+d 키를 여러번 누르면 된다.
인텔리제이에서도 동일한 기능이 존재했다.
다만 인텔리제이 버전이나 운영체제(윈도우, 맥, 리눅스)에 따라 단축키가 다르게 설정되어 있어
이를 편하게 이용하려면 변경이 필요하다.
많은 블로그의 글에서 단축키를 알려주지만 해당 단축키를 KeyMap에서 찾는 기능은
잘 소개를 안해주는 것 같아서 글을 쓴다.
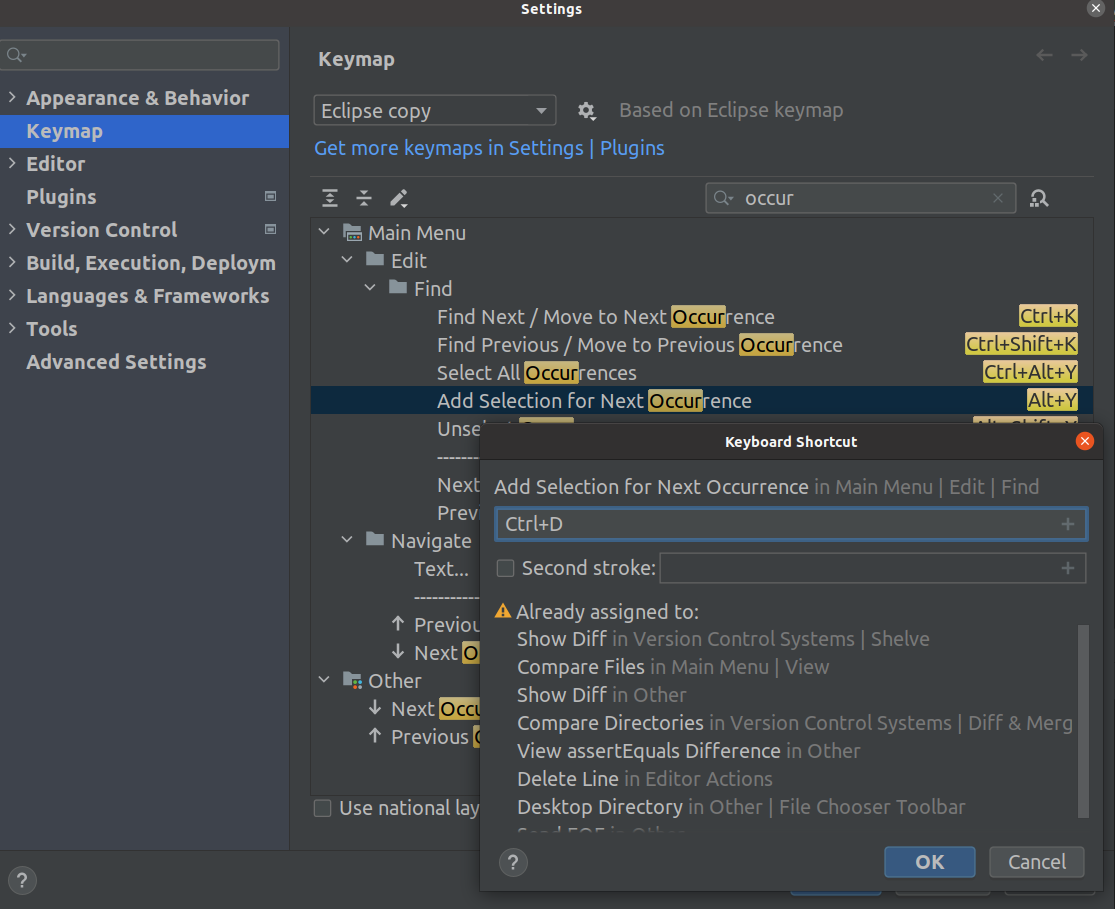
Add Selection for Next Occurence
인텔리제이에서 vscode ctrl+d 의 단축키 기능의 이름은
'Add Selection for Next Occurence' 이다.
해당 기능의 단축키를 변경하기 위해
인텔리제이 메뉴에서
File -> Settings -> KeyMap으로 이동해서
검색창에 occur을 검색해서 'Add Selection for Next Occurence' 를 찾아
우클릭하여 keyboard shortcut 을 추가해주면 단축키가 설정된다.
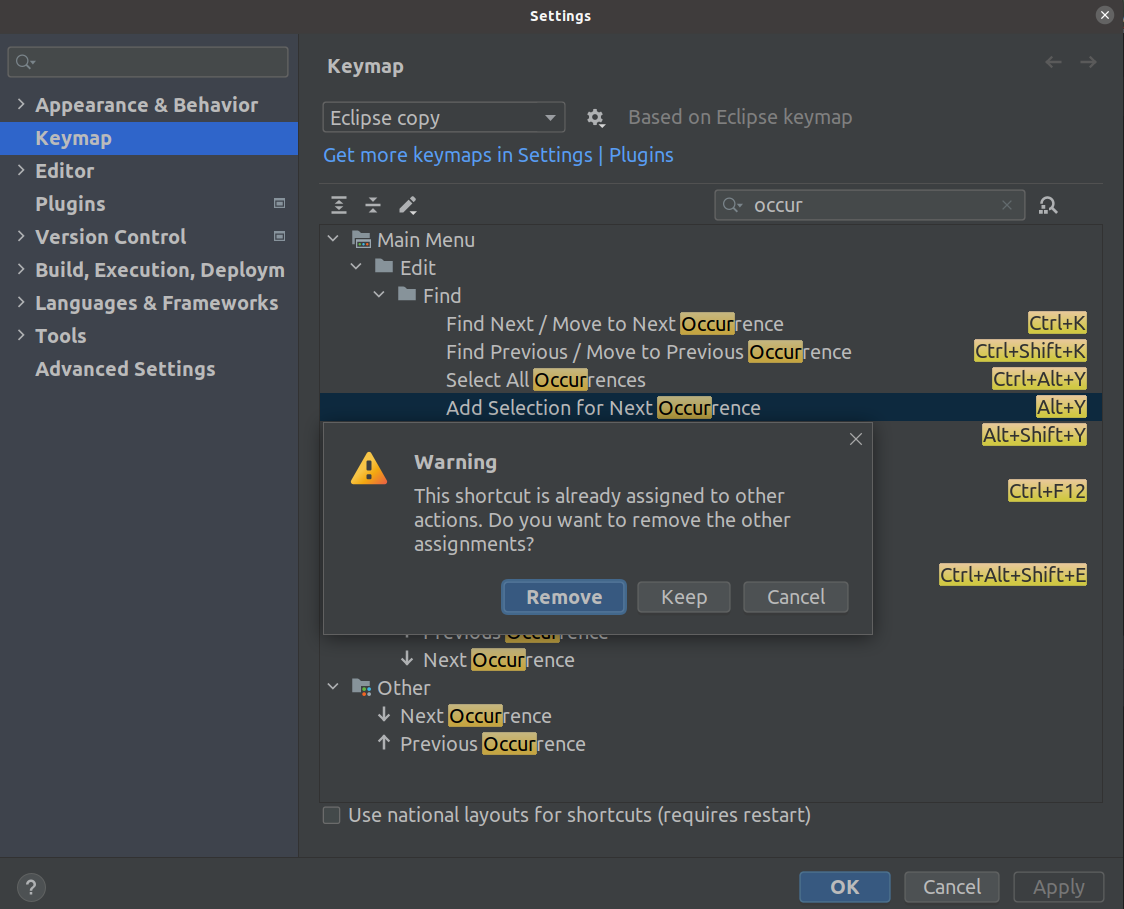
만약 나처럼 ctrl+d를 단축키로 이용하려면
이미 인텔리제이에서는 ctrl+d가 다른 기능으로 맵핑되어 있기 때문에
이미 맵핑되어 있는 기능을 다 제거해주어야 한다.
위와 같은 warning 문구가 나타나면 remove를 해야
내가 새로 설정한 키로 기능을 올바르게 이용할 수 있다.
Add Selection for Next Occurence와 유사한 단축키 설명
IntelliJ IDEA 13.1 RC Introduces Sublime Text Style Multiple Selections | The IntelliJ IDEA Blog
We have two exciting pieces of news for you today.First of all, IntelliJ IDEA 13.1 RC is now available for download, so you can try all the new features right away. By the way, this is the last chan
blog.jetbrains.com
'Java' 카테고리의 다른 글
| [Java] PS를 위한 fastio 코드, BufferedWriter, System.out.print 소요 시간 비교 (0) | 2022.09.21 |
|---|---|
| Eclipse 단축키가 안될 때 (자동 정렬 안될 때, 주석 안될 때) window (1) | 2022.04.11 |
| 추상 클래스의 상속, 추상 클래스 사용 이유 (0) | 2021.11.24 |

