반응형

Operating System은 컴퓨터의 하드웨어를 관리하는 소프트웨어이다.

컴퓨터의 하드웨어는 CPU, 메모리 , IO device를 의미한다.


반응형
반응형

디스크와 메인 메모리(사이 버퍼)

프로그램이 하나의 Logical Record를 요청할 때


디스크에 있는 Physical Record인 한 block이 

메인 메모리의 버퍼에 저장되고, 

프로세스는 버퍼에 저장된 데이터를 Work Area로 불러와 해당 데이터를 이용해서 프로세스를 실행한다.


이때 버퍼의 자료구조는 Circular Linked List를 이용하여

다중 버퍼로 구현될 수 있다. 


프로그램 코드에서 open으로 파일을 불러올 때 

디스크에서 해당하는 파일의 첫번째 블록을 메인 메모리의 input 버퍼에 저장한다.


이때 첫번째 블록을 버퍼로 로드하는 이유는 미리 블록을 로드해두면

이후에 만약 첫번째 블록에 해당하는 데이터를 이용해야하는 일이 있으면

디스크에 Access할 필요 없이 바로 다음 명령을 진행할 수 있어서 효율적이다. 

물론 첫번째 블록에 해당하는 데이터를 이용하지 않는 경우도 있다.


버퍼

만약 A라는 프로세스가 x,y,z라는 파일을 open으로 읽는다면

IO Buffer역할을 하는 메모리가 메인 메모리에 할당된다.

그리고 후에 close를 하면 할당했던 메모리를 반환하여 다른 프로그램이 메모리를 활용할 수 있도록 한다.

그리고 프로그램을 종료할 때 꼭 close를 해야 메인 메모리에 있는 Output Buffer에 있는 데이터가

디스크에 올바르게 저장된 후 프로세스가 종료된다.


버퍼안의 여러개의 블록을 저장할수록

디스크 Access가 줄어들어 Io의 속도가 빨라지지만 메인메모리의 용량은 한정되어있어

만약 버퍼가 과도하게 메모리를 차지하게 되면 다른 프로세스가 사용할 수 있는 메모리의 양이 줄어들어

전체적인 프로세스 스케줄링이 비효율적으로 된다.


반응형
반응형

https://www.acmicpc.net/problem/1004


1004번: 어린 왕자

입력의 첫 줄에는 테스트 케이스의 개수 T가 주어진다. 그 다음 줄부터 각각의 테스트케이스에 대해 첫째 줄에 출발점 (x1, y1)과 도착점 (x2, y2)이 주어진다. 두 번째 줄에는 행성계의 개수 n이 주

www.acmicpc.net

#include <bits/stdc++.h>
using namespace std;

int stx,sty, enx,eny;

bool inAndOut(int x, int y, int r){
    int startToCircleDist = (stx-x)*(stx-x) + (sty-y)*(sty-y);
    int endToCircleDist = (enx-x)*(enx-x) + (eny-y)*(eny-y);
    int R = r*r;

    if((startToCircleDist > R && endToCircleDist < R)||(startToCircleDist < R && endToCircleDist > R)) return true;
    return false;
}


int main() {
    ios::sync_with_stdio(0); cin.tie(0);

    int T;
    cin>> T;
    for(int t=0;t<T; t++){
        int n;
        cin >> stx >> sty >> enx >> eny >> n;

        int ans = 0;
        for(int i=0; i<n; i++){
            int x, y, r;
            cin >> x >> y >> r;
            if(inAndOut(x,y,r)) ans++;
        }
        cout << ans << '\n';
    }

    return 0;
}


반응형
반응형

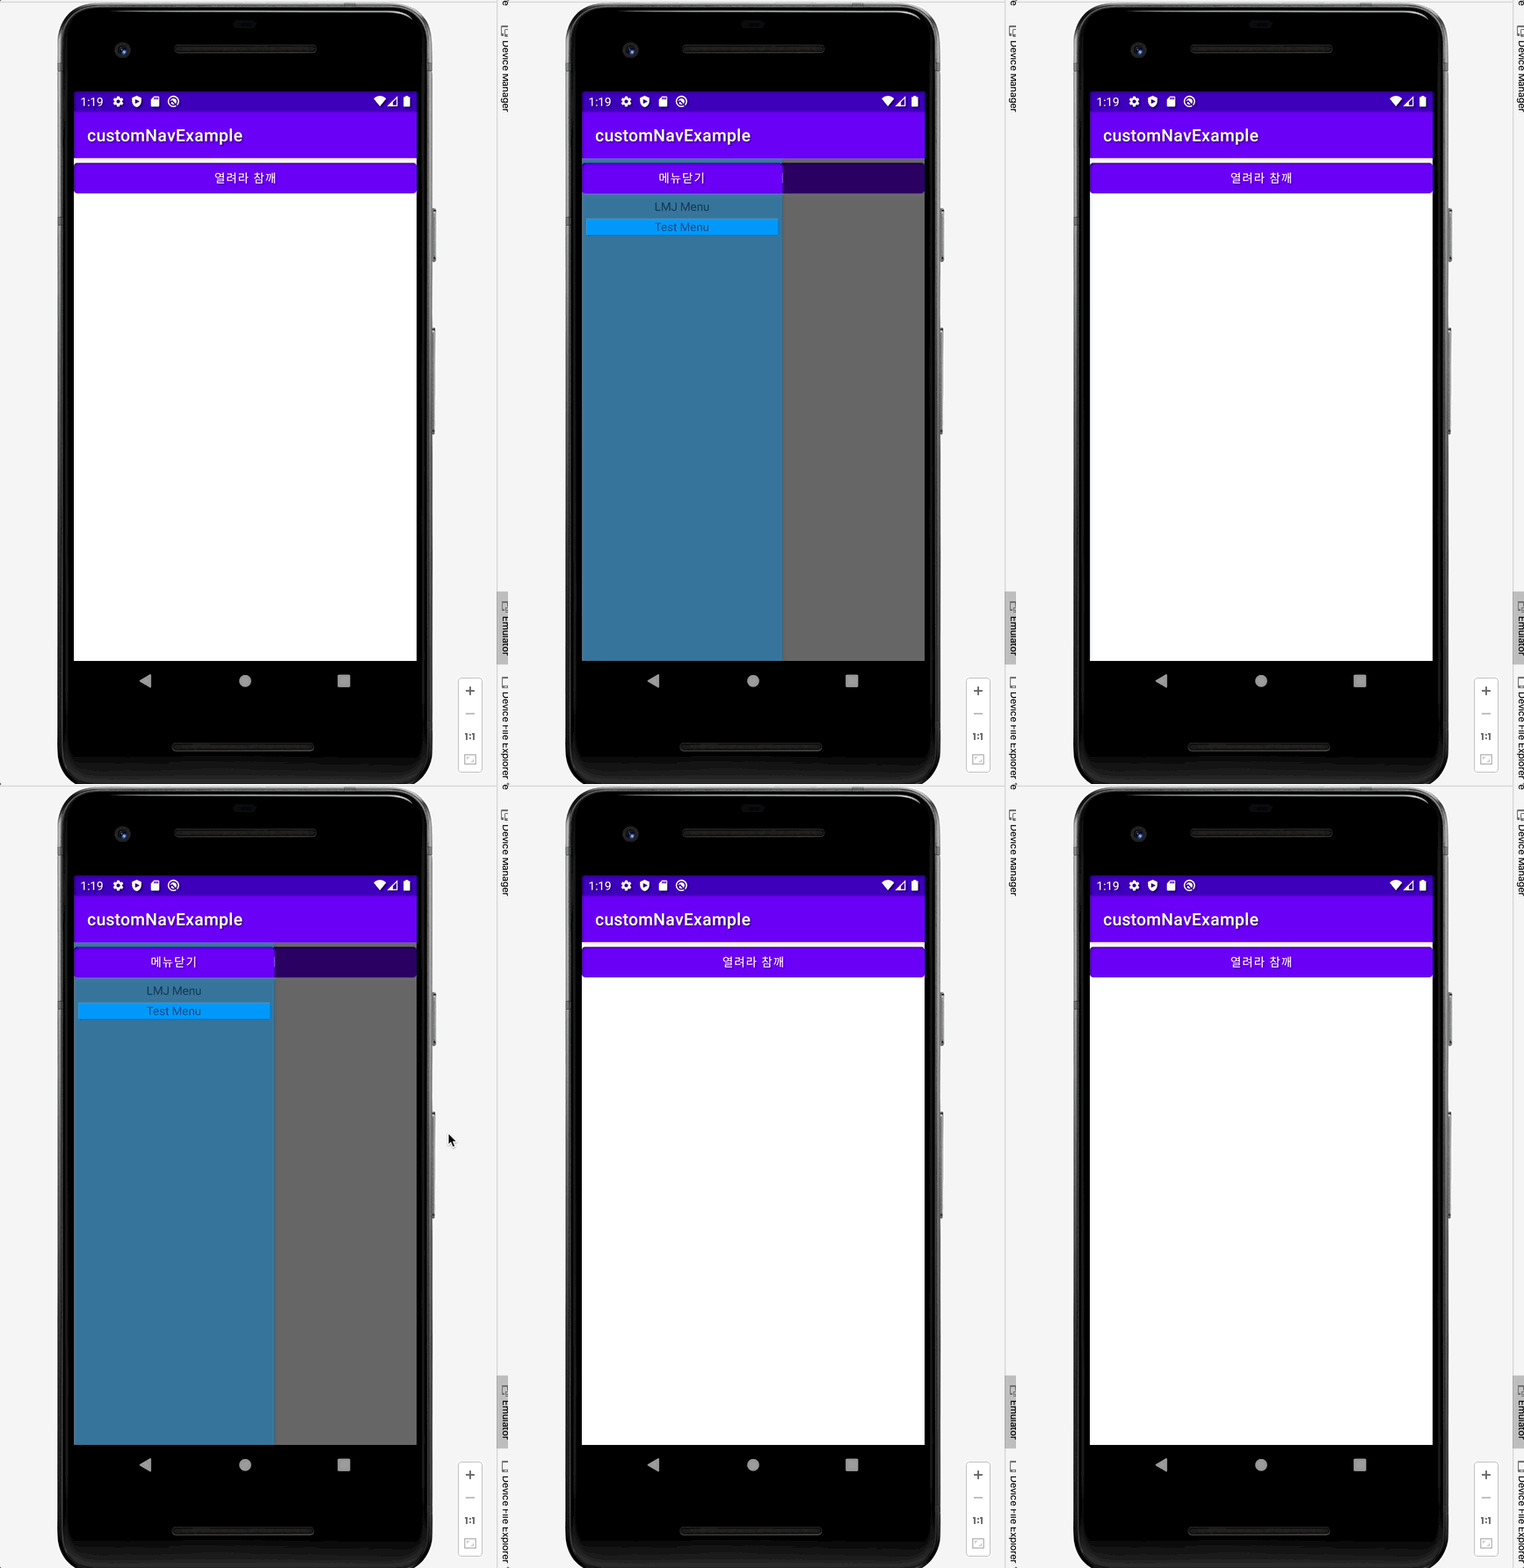
android nav 만들기

package com.example.customnavexample;

import androidx.annotation.NonNull;
import androidx.appcompat.app.AppCompatActivity;
import androidx.drawerlayout.widget.DrawerLayout;

import android.os.Bundle;
import android.view.MotionEvent;
import android.view.View;
import android.widget.Button;

public class MainActivity extends AppCompatActivity {

    private DrawerLayout drawerLayout;
    private View drawerView;

    @Override
    protected void onCreate(Bundle savedInstanceState) {
        super.onCreate(savedInstanceState);
        setContentView(R.layout.activity_main);

        drawerLayout = (DrawerLayout) findViewById(R.id.drawer_layout);
        drawerView = (View) findViewById(R.id.drawer);

        Button btn_open = (Button)findViewById(R.id.btn_open);
        btn_open.setOnClickListener(new View.OnClickListener() {
            @Override
            public void onClick(View view) {
                drawerLayout.openDrawer(drawerView);
            }
        });

        Button btn_close = (Button)findViewById(R.id.btn_close);
        btn_close.setOnClickListener(new View.OnClickListener() {
            @Override
            public void onClick(View view) {
                drawerLayout.closeDrawers();
            }
        });


        drawerLayout.setDrawerListener(listener);
        drawerView.setOnTouchListener(new View.OnTouchListener() {
            @Override
            public boolean onTouch(View view, MotionEvent motionEvent) {
                return true;
            }
        });

    }
    DrawerLayout.DrawerListener listener = new DrawerLayout.DrawerListener() {
        @Override
        public void onDrawerSlide(@NonNull View drawerView, float slideOffset) {

        }

        @Override
        public void onDrawerOpened(@NonNull View drawerView) {

        }

        @Override
        public void onDrawerClosed(@NonNull View drawerView) {

        }

        @Override
        public void onDrawerStateChanged(int newState) {

        }
    };


}


<?xml version="1.0" encoding="utf-8"?>

<androidx.drawerlayout.widget.DrawerLayout xmlns:android="http://schemas.android.com/apk/res/android"
    xmlns:app="http://schemas.android.com/apk/res-auto"
    xmlns:tools="http://schemas.android.com/tools"
    android:id="@+id/drawer_layout"
    android:layout_width="match_parent"
    android:layout_height="match_parent"
    tools:context=".MainActivity">

    <LinearLayout
        android:layout_width="match_parent"
        android:layout_height="match_parent">

        <Button
            android:id="@+id/btn_open"
            android:layout_width="match_parent"
            android:layout_height="wrap_content"
            android:text="열려라 참깨"/>
    </LinearLayout>

    <!-- drawer.xml 연결-->
    <include layout="@layout/activity_drawer"/>

</androidx.drawerlayout.widget.DrawerLayout>


<?xml version="1.0" encoding="utf-8"?>
<LinearLayout xmlns:android="http://schemas.android.com/apk/res/android"
    android:layout_width="240dp"
    android:layout_height="match_parent"
    android:layout_gravity="start"
    android:background="#632196F3"
    android:id="@+id/drawer"
    android:orientation="vertical">

    <Button
        android:id="@+id/btn_close"
        android:layout_width="match_parent"
        android:layout_height="wrap_content"
        android:text="메뉴닫기"/>
    <TextView
        android:layout_width="match_parent"
        android:layout_height="wrap_content"
        android:gravity="center"
        android:text="LMJ Menu"/>


    <LinearLayout
        android:layout_width="match_parent"
        android:layout_height="wrap_content"
        android:layout_margin="5dp"
        android:background="#2196F3"
        android:orientation="vertical"
        >

        <TextView
            android:layout_width="match_parent"
            android:layout_height="wrap_content"
            android:gravity="center"
            android:text="Test Menu"
            />

    </LinearLayout>
</LinearLayout>
반응형
반응형

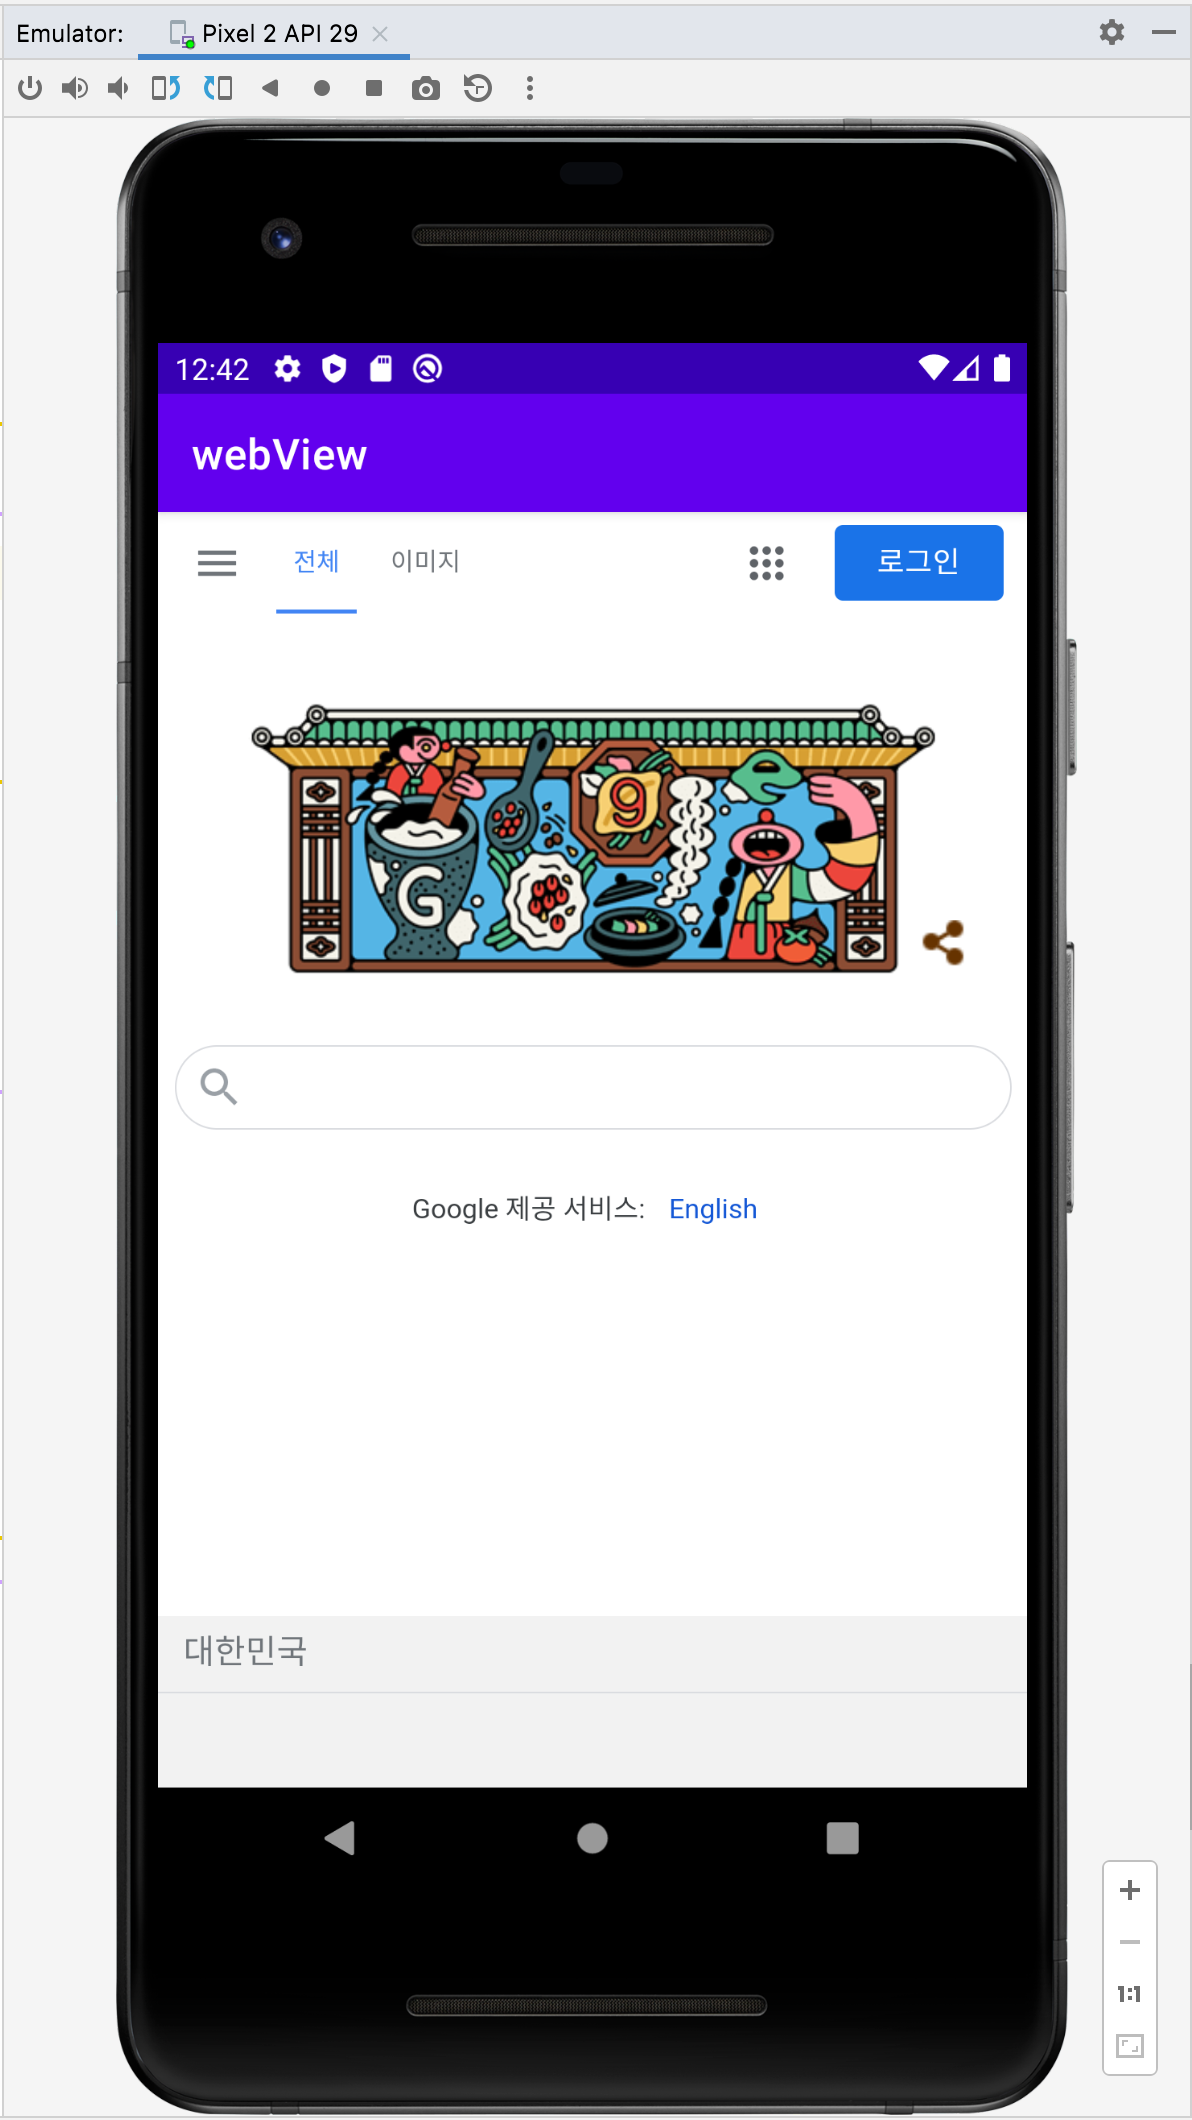
WebView를 이용해 url에 접속할 수 있다.

   <WebView
        android:id="@+id/webView"
        android:layout_width="match_parent"
        android:layout_height="match_parent"
        ></WebView>

activity xml에 WebView 컴포넌트를 추가해준다.


MainActivity.java

package com.example.webview;

import androidx.appcompat.app.AppCompatActivity;

import android.os.Bundle;
import android.view.KeyEvent;
import android.webkit.WebChromeClient;
import android.webkit.WebView;
import android.webkit.WebViewClient;

public class MainActivity extends AppCompatActivity {

    private WebView webView;
    private String url = "https://google.com";

    @Override
    protected void onCreate(Bundle savedInstanceState) {
        super.onCreate(savedInstanceState);
        setContentView(R.layout.activity_main);

        webView = (WebView) findViewById(R.id.webView);
        webView.getSettings().setJavaScriptEnabled(true);
        webView.loadUrl(url);
        webView.setWebChromeClient(new WebChromeClient());
        webView.setWebViewClient(new WebViewClientClass());

    }

    @Override
    public boolean onKeyDown(int keyCode, KeyEvent event) {
        if((keyCode == KeyEvent.KEYCODE_BACK) && webView.canGoBack()){
            webView.goBack();
            return true;
        }

        return super.onKeyDown(keyCode, event);
    }

    private class WebViewClientClass extends WebViewClient {
        @Override
        public boolean shouldOverrideUrlLoading(WebView view, String url) {
            view.loadUrl(url);
            return true;
        }
    }
}


AndroidManifest.xml

<?xml version="1.0" encoding="utf-8"?>
<manifest xmlns:android="http://schemas.android.com/apk/res/android"
    xmlns:tools="http://schemas.android.com/tools"
    package="com.example.webview">

    <!--  인터넷 권한 설정  -->
    <uses-permission android:name="android.permission.INTERNET"/>
    
    <application
        android:allowBackup="true"
        android:dataExtractionRules="@xml/data_extraction_rules"
        android:fullBackupContent="@xml/backup_rules"
        android:icon="@mipmap/ic_launcher"
        android:label="@string/app_name"
        android:roundIcon="@mipmap/ic_launcher_round"
        android:supportsRtl="true"
        android:theme="@style/Theme.WebView"
        tools:targetApi="31">
        <activity
            android:name=".MainActivity"
            android:exported="true">
            <intent-filter>
                <action android:name="android.intent.action.MAIN" />

                <category android:name="android.intent.category.LAUNCHER" />
            </intent-filter>
        </activity>
    </application>

</manifest>


반응형
반응형

android SharedPreference

package com.example.sharedpreferences;

import androidx.appcompat.app.AppCompatActivity;

import android.content.SharedPreferences;
import android.os.Bundle;
import android.widget.EditText;

public class MainActivity extends AppCompatActivity {
    EditText et_save;
    String shared = "file";

    @Override
    protected void onCreate(Bundle savedInstanceState) {
        super.onCreate(savedInstanceState);
        setContentView(R.layout.activity_main);

        et_save = (EditText) findViewById(R.id.et_save);

        //앱이 꺼질 때 저장된 정보를 불러오는 코드
        SharedPreferences sharedPreferences = getSharedPreferences(shared, 0);
        String value = sharedPreferences.getString("key", "");
        et_save.setText(value);
    }

    @Override
    protected void onDestroy() {
        super.onDestroy();

        //앱이 꺼졋을 때 정보를 저장하는 코드
        SharedPreferences sharedPreferences = getSharedPreferences(shared, 0);
        SharedPreferences.Editor editor = sharedPreferences.edit();
        String value = et_save.getText().toString();
        editor.putString("key", value);
        editor.commit();

    }
}

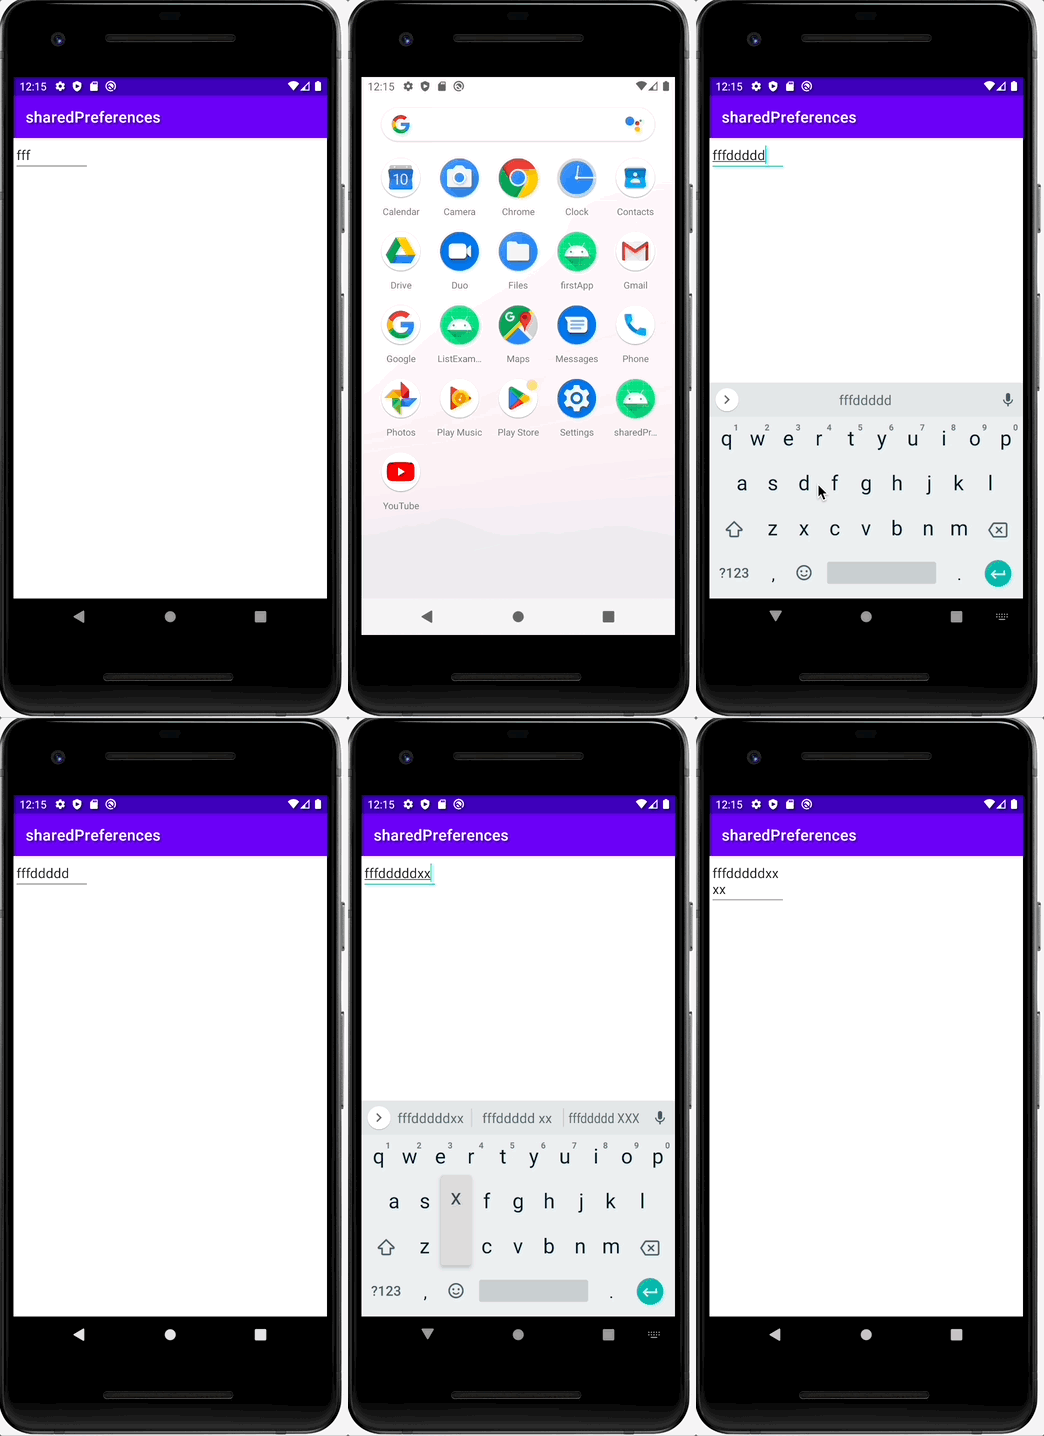
SharedPreferences 를 이용하면 앱에서 뒤로가기를 눌러도

데이터를 임시 저장할 수 있다

단 앱을 삭제하거나 완전히 종료할 때는 정보를 저장하는 것이 불가능하다.

이때는 데이터베이스를 추가적으로 이용해야한다.

반응형
반응형

android ListView


package com.example.listexample01;

import androidx.appcompat.app.AppCompatActivity;

import android.os.Bundle;
import android.widget.ArrayAdapter;
import android.widget.ListView;

import java.util.ArrayList;
import java.util.List;

public class MainActivity extends AppCompatActivity {
    private ListView list;

    @Override
    protected void onCreate(Bundle savedInstanceState) {
        super.onCreate(savedInstanceState);
        setContentView(R.layout.activity_main);

        list = (ListView) findViewById(R.id.list);
        List<String> data = new ArrayList<>();

        ArrayAdapter<String> adapter = new ArrayAdapter<>(this, android.R.layout.simple_list_item_1, data);
        list.setAdapter(adapter);

        data.add("LMJ");
        data.add("Fighting!");
        data.add("Fighting!");
        adapter.notifyDataSetChanged();

    }
}


<?xml version="1.0" encoding="utf-8"?>
<LinearLayout xmlns:android="http://schemas.android.com/apk/res/android"
    xmlns:app="http://schemas.android.com/apk/res-auto"
    xmlns:tools="http://schemas.android.com/tools"
    android:layout_width="match_parent"
    android:layout_height="match_parent"
    android:orientation="vertical"
    tools:context=".MainActivity">

    <TextView
        android:layout_width="wrap_content"
        android:layout_height="wrap_content"
        android:text="Hello World!"
        app:layout_constraintBottom_toBottomOf="parent"
        app:layout_constraintEnd_toEndOf="parent"
        app:layout_constraintStart_toStartOf="parent"
        app:layout_constraintTop_toTopOf="parent" />

    <ListView
        android:id="@+id/list"
        android:layout_width="match_parent"
        android:layout_height="wrap_content">
    </ListView>

</LinearLayout>


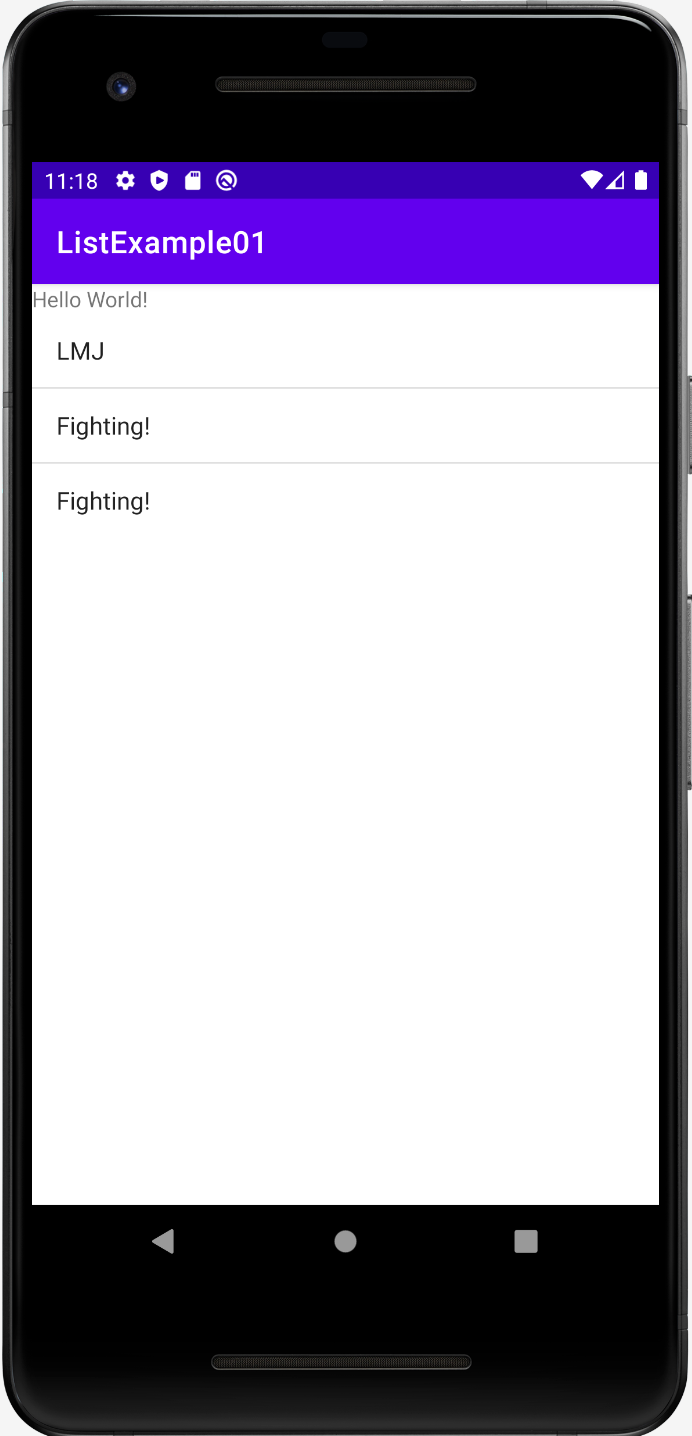
ArrayList 와 실제 레이아웃의 ListView를 연결해주기 위해서는

다음과 같이 adapter를 이용하여 둘을 연결해주어야 한다.

        list = (ListView) findViewById(R.id.list);
        List<String> data = new ArrayList<>();

        ArrayAdapter<String> adapter = new ArrayAdapter<>(this, android.R.layout.simple_list_item_1, data);
        list.setAdapter(adapter);

        data.add("LMJ");
        data.add("Fighting!");
        data.add("Fighting!");
        adapter.notifyDataSetChanged();
반응형
반응형

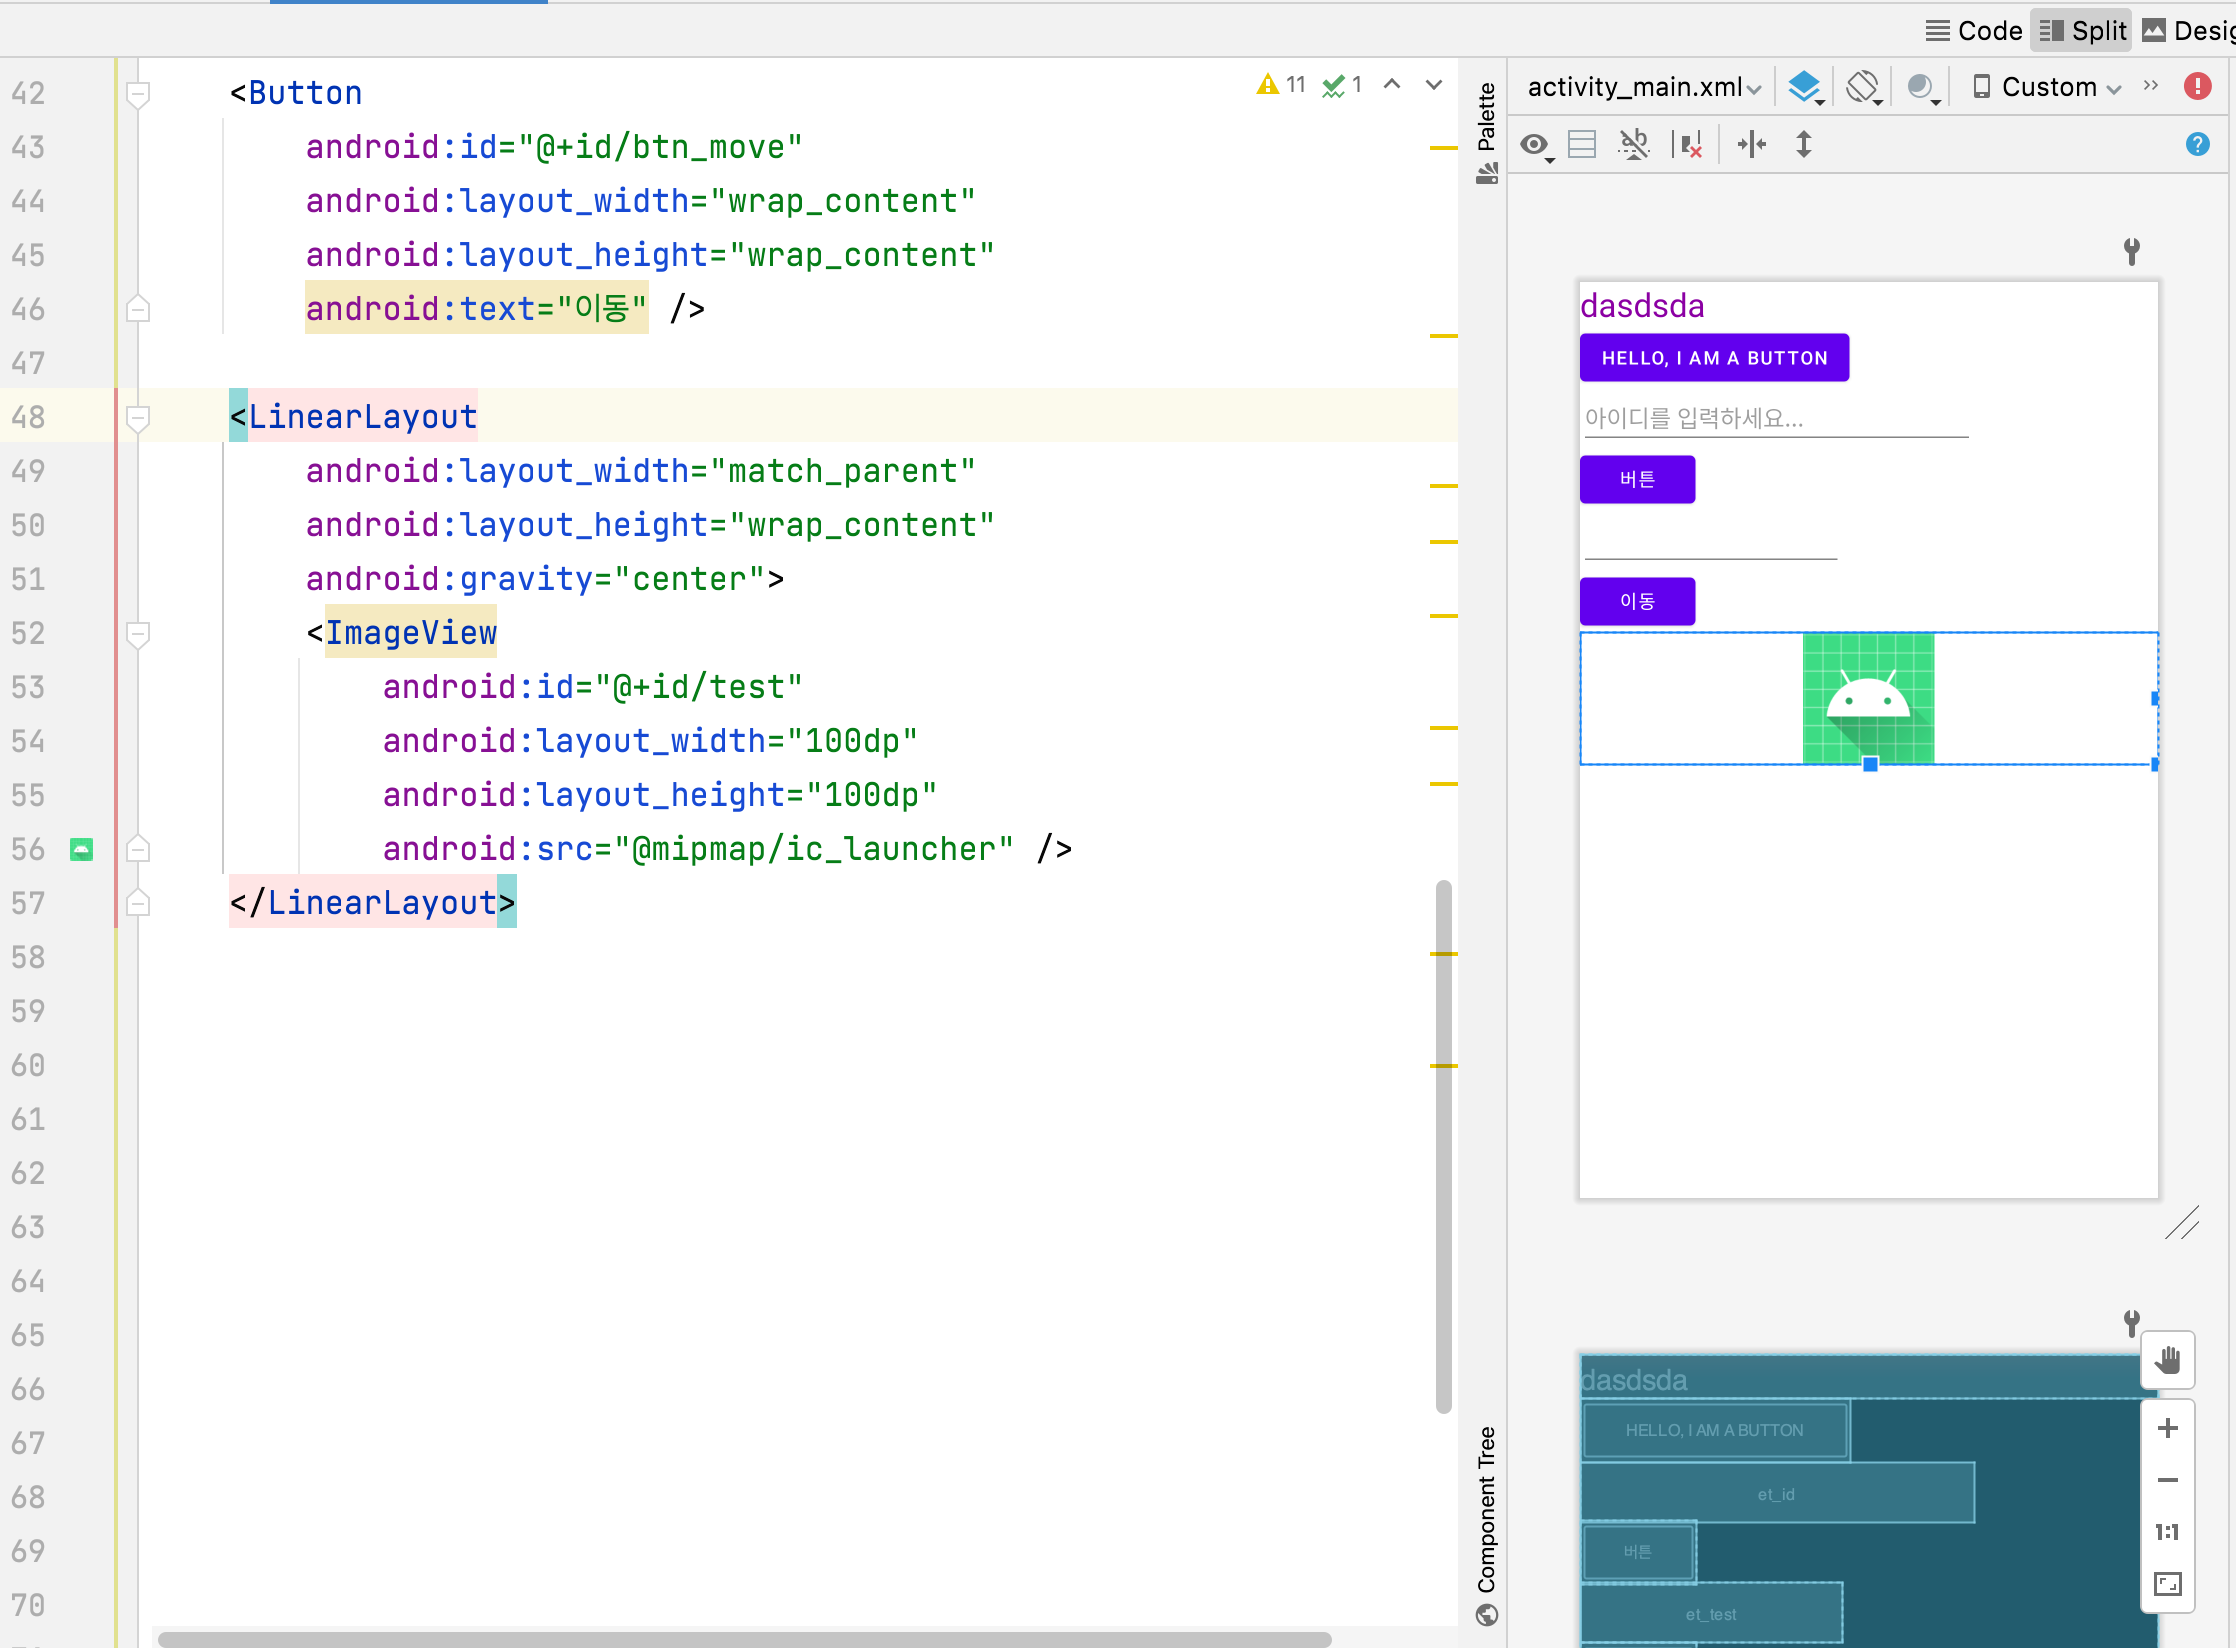
XML에서 gravity를 이용해 요소를 가운데 배치하기

    <LinearLayout
        android:layout_width="match_parent"
        android:layout_height="wrap_content"
        android:gravity="center">
        <ImageView
            android:id="@+id/test"
            android:layout_width="100dp"
            android:layout_height="100dp"
            android:src="@mipmap/ic_launcher" />
    </LinearLayout>

LinearLayout 안에 요소를 넣고

LinearLayout의 gravity property를 center로 주면

요소를 가운데로 배치할 수 있다

반응형

+ Recent posts