반응형

onCreate is called on initial creation of the fragment. You do your non graphical initializations here. It finishes even before the layout is inflated and the fragment is visible.


onCreateView is called to inflate the layout of the fragment i.e graphical initialization usually takes place here. It is always called some time after the onCreate method.

반응형
반응형

android SharedPreference

package com.example.sharedpreferences;

import androidx.appcompat.app.AppCompatActivity;

import android.content.SharedPreferences;
import android.os.Bundle;
import android.widget.EditText;

public class MainActivity extends AppCompatActivity {
    EditText et_save;
    String shared = "file";

    @Override
    protected void onCreate(Bundle savedInstanceState) {
        super.onCreate(savedInstanceState);
        setContentView(R.layout.activity_main);

        et_save = (EditText) findViewById(R.id.et_save);

        //앱이 꺼질 때 저장된 정보를 불러오는 코드
        SharedPreferences sharedPreferences = getSharedPreferences(shared, 0);
        String value = sharedPreferences.getString("key", "");
        et_save.setText(value);
    }

    @Override
    protected void onDestroy() {
        super.onDestroy();

        //앱이 꺼졋을 때 정보를 저장하는 코드
        SharedPreferences sharedPreferences = getSharedPreferences(shared, 0);
        SharedPreferences.Editor editor = sharedPreferences.edit();
        String value = et_save.getText().toString();
        editor.putString("key", value);
        editor.commit();

    }
}

SharedPreferences 를 이용하면 앱에서 뒤로가기를 눌러도

데이터를 임시 저장할 수 있다

단 앱을 삭제하거나 완전히 종료할 때는 정보를 저장하는 것이 불가능하다.

이때는 데이터베이스를 추가적으로 이용해야한다.

반응형
반응형

android ListView


package com.example.listexample01;

import androidx.appcompat.app.AppCompatActivity;

import android.os.Bundle;
import android.widget.ArrayAdapter;
import android.widget.ListView;

import java.util.ArrayList;
import java.util.List;

public class MainActivity extends AppCompatActivity {
    private ListView list;

    @Override
    protected void onCreate(Bundle savedInstanceState) {
        super.onCreate(savedInstanceState);
        setContentView(R.layout.activity_main);

        list = (ListView) findViewById(R.id.list);
        List<String> data = new ArrayList<>();

        ArrayAdapter<String> adapter = new ArrayAdapter<>(this, android.R.layout.simple_list_item_1, data);
        list.setAdapter(adapter);

        data.add("LMJ");
        data.add("Fighting!");
        data.add("Fighting!");
        adapter.notifyDataSetChanged();
    }
}


<?xml version="1.0" encoding="utf-8"?>
<LinearLayout xmlns:android="http://schemas.android.com/apk/res/android"
    xmlns:app="http://schemas.android.com/apk/res-auto"
    xmlns:tools="http://schemas.android.com/tools"
    android:layout_width="match_parent"
    android:layout_height="match_parent"
    android:orientation="vertical"
    tools:context=".MainActivity">

    <TextView
        android:layout_width="wrap_content"
        android:layout_height="wrap_content"
        android:text="Hello World!"
        app:layout_constraintBottom_toBottomOf="parent"
        app:layout_constraintEnd_toEndOf="parent"
        app:layout_constraintStart_toStartOf="parent"
        app:layout_constraintTop_toTopOf="parent" />

    <ListView
        android:id="@+id/list"
        android:layout_width="match_parent"
        android:layout_height="wrap_content">
    </ListView>

</LinearLayout>


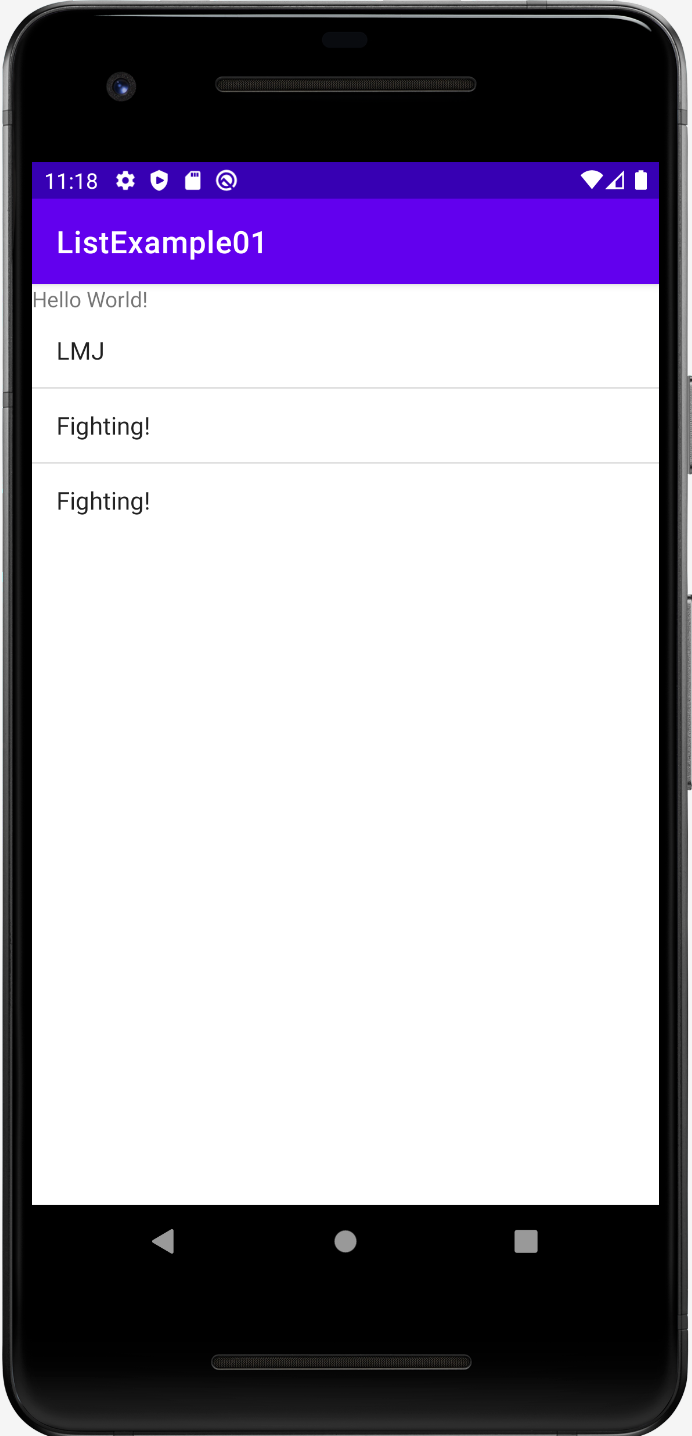
ArrayList 와 실제 레이아웃의 ListView를 연결해주기 위해서는

다음과 같이 adapter를 이용하여 둘을 연결해주어야 한다.

        list = (ListView) findViewById(R.id.list);
        List<String> data = new ArrayList<>();

        ArrayAdapter<String> adapter = new ArrayAdapter<>(this, android.R.layout.simple_list_item_1, data);
        list.setAdapter(adapter);

        data.add("LMJ");
        data.add("Fighting!");
        data.add("Fighting!");
        adapter.notifyDataSetChanged();
반응형
반응형


Intent를 이용하여 다른 컴포넌트로 이동할 수 있고,

putExtra와 getExtra에 키값을 주어 데이터를 전달 할 수 있다.


MainActivity

package com.example.firstapp;

import androidx.appcompat.app.AppCompatActivity;

import android.content.Intent;
import android.os.Bundle;
import android.view.View;
import android.widget.Button;
import android.widget.EditText;

public class MainActivity extends AppCompatActivity {
    EditText et_id;
    Button btn_test;

    private EditText et_test;
    private Button btn_move;
    private String str;

    @Override
    protected void onCreate(Bundle savedInstanceState) {
        super.onCreate(savedInstanceState);
        setContentView(R.layout.activity_main);
        et_test = findViewById(R.id.et_test);

        btn_move = findViewById(R.id.btn_move);
        btn_move.setOnClickListener(new View.OnClickListener() {
            @Override
            public void onClick(View view) {
                Intent intent = new Intent(MainActivity.this, SubActivity.class);
                str = et_test.getText().toString();
                intent.putExtra("str", str);
                startActivity(intent);
            }
        });

        et_id = findViewById(R.id.et_id);
        btn_test = findViewById(R.id.btn_test);

        btn_test.setOnClickListener(new View.OnClickListener() {
            @Override
            public void onClick(View view) {
                et_id.setText("LMJ");
            }
        });
    }
}


SubActivity

package com.example.firstapp;

import androidx.appcompat.app.AppCompatActivity;

import android.content.Intent;
import android.os.Bundle;
import android.widget.TextView;

public class SubActivity extends AppCompatActivity {

    private TextView tv_sub;

    @Override
    protected void onCreate(Bundle savedInstanceState) {
        super.onCreate(savedInstanceState);
        setContentView(R.layout.activity_sub);

        tv_sub = findViewById(R.id.tv_sub);

        Intent intent = getIntent();
        String str = intent.getStringExtra("str");

        tv_sub.setText(str);
    }
}


반응형

+ Recent posts